Choosing the perfect label for your product isn’t as simple as it sounds. With so many materials, adhesives, and designs to pick from, it can feel like an overwhelming task. But here’s the good news: with the right approach, you can create a label that not only looks amazing but also fits your product like a glove.
This guide will walk you through the key steps to help you make the best decision, whether you’re launching a new product or revamping an existing one. Let’s get started!
Step 1: Understand Your Product’s Environment
The first thing to consider is where your product will live. Labels need to perform under different conditions, so understanding the environment is crucial.
Moisture and Humidity
If your product is stored in a fridge or exposed to condensation, your label must be water-resistant. Materials like polypropylene are perfect for this—they’re durable, waterproof, and won’t smudge or peel.
Heat and Sunlight
For products placed in sunny or hot areas, UV-resistant materials and fade-proof inks are a must. This ensures your label stays vibrant and intact over time.
Wear and Tear
Products that are handled frequently, such as beauty items or cleaning sprays, need labels that are tough and abrasion-resistant. Strong adhesives and durable finishes can keep your label looking pristine.
Step 2: Match the Label to Your Brand Aesthetic
Your label should be a reflection of your brand. From the material to the finish, every detail matters.
Material Choices
Textured paper gives a rustic, handmade feel—great for artisanal products. Metallic polypropylene adds a premium touch, while transparent labels create a modern, minimalist look.
Finish Selection
Matte finishes are subtle and sophisticated, while gloss finishes make colors pop. Want to add something extra? Try embossing or spot UV for a tactile, high-end effect.
Color Consistency
Your brand colors are essential to your identity. Make sure your printing method ensures consistent, vibrant colors across all your labels.
Step 3: Consider Label Shape and Size
The size and shape of your label play a big role in how it fits your product’s packaging and communicates your brand.
Custom Die-Cuts
Unique shapes, like stars or hearts, can make your product stand out on the shelf. Custom die-cuts are perfect for adding a creative edge.
Wrap-Around Labels
Bottles and cans often benefit from wrap-around labels, which give you more space for branding, product info, and even interactive elements like QR codes.
Front-and-Back Labels
For jars or tubs, a front-and-back label combination is a practical choice. Use the front for branding and the back for details like ingredients or instructions.
Step 4: Don’t Skimp on Adhesive
The adhesive is what keeps your label in place. Choose the wrong one, and you might end up with peeling labels or sticky residue.
Permanent Adhesives
These are ideal for long-term use. They’re durable and reliable, ensuring your label stays put.
Peelable Adhesives
If your product uses reusable packaging or promotional stickers, peelable adhesives are a great choice. They stick securely but can be removed without leaving residue.
Specialty Adhesives
For niche needs, like heat-resistant labels for candles or wash-off adhesives for recyclable containers, specialty adhesives are the way to go.
Step 5: Think About Your Industry’s Requirements
Each industry has its own specific needs, and your label must meet those standards. Here’s a quick breakdown:
Food and Beverage
Labels need to include nutritional information, ingredients, and expiration dates. They also need to withstand moisture and temperature changes.
Cosmetics
Beauty products often face exposure to water and oils, so labels must be durable and high-quality. A sleek design can also help convey luxury.
Logistics and Retail
For logistics, barcodes, QR codes, and tracking information are essential. These labels need to be scannable and smudge-proof.
Step 6: Sustainability Is the Future
Consumers are increasingly drawn to eco-friendly options, and your label is a great way to show your brand’s commitment to sustainability. Recycled papers, biodegradable adhesives, and wash-off labels are just a few options to consider.
Don’t forget to highlight these efforts on your label—statements like “Printed on recycled materials” can resonate with eco-conscious shoppers.
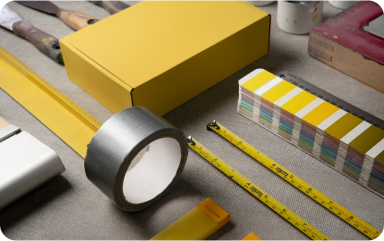
Step 7: Test It with a Sample Pack
Not sure where to start? That’s where a Sample Pack comes in handy. It’s a curated collection of materials, finishes, and adhesives, so you can test and compare options before making a decision. Seeing and feeling the materials firsthand can make all the difference.
Conclusion: Your Label, Your Story
Choosing the perfect label for your product doesn’t have to be overwhelming. By considering the environment, aligning with your brand aesthetic, and selecting the right materials and adhesives, you can create a label that not only sticks but stands out.
At labelprint.com, we’re here to help every step of the way. From cutting-edge digital printing technology to our Sample Pack, we’ve got everything you need to make your labels unforgettable. So, why wait? Start your label journey today!